Import (Data Input)
The Import screen is the landing page of the application. It handles loading, initial validation, and parsing of all session logs and image frames.
Import Workflow & View Modes
The import view transitions dynamically through three visual modes:
- Welcome Screen :
- Displays a drag-and-drop zone where you can drop a directory containing your session.
- Shows introductory tips and guides.
- Or you can just press enter to Select the root folder for all your lights and metadata from one or multiple nights.
- Log Screen :
- Active during file parsing.
- Displays a live console viewer logging all read operations (e.g.,
"reading PHD2_GuideLog.txt"). - Color-coded messages distinguish logs: Info (Standard Text), Note (Green), Warnings (Orange), and Errors (Red).
- Displays a detailed progress bar indicating how many FITS headers have been scanned.
- Summary Screen :
- Appears once imports are complete.
- Renders a multi-tab panel to explore the raw loaded data:
- Summary: General details showing the count of lights, target coordinates, and equipment.
- AllSky: Plotting session coordinates on a custom wide-field sky grid.
- Platesolve: Active if astrometric solutions/WCS metadata are present inside the FITS headers.
- Logs: Color-coded view of parsed logs.
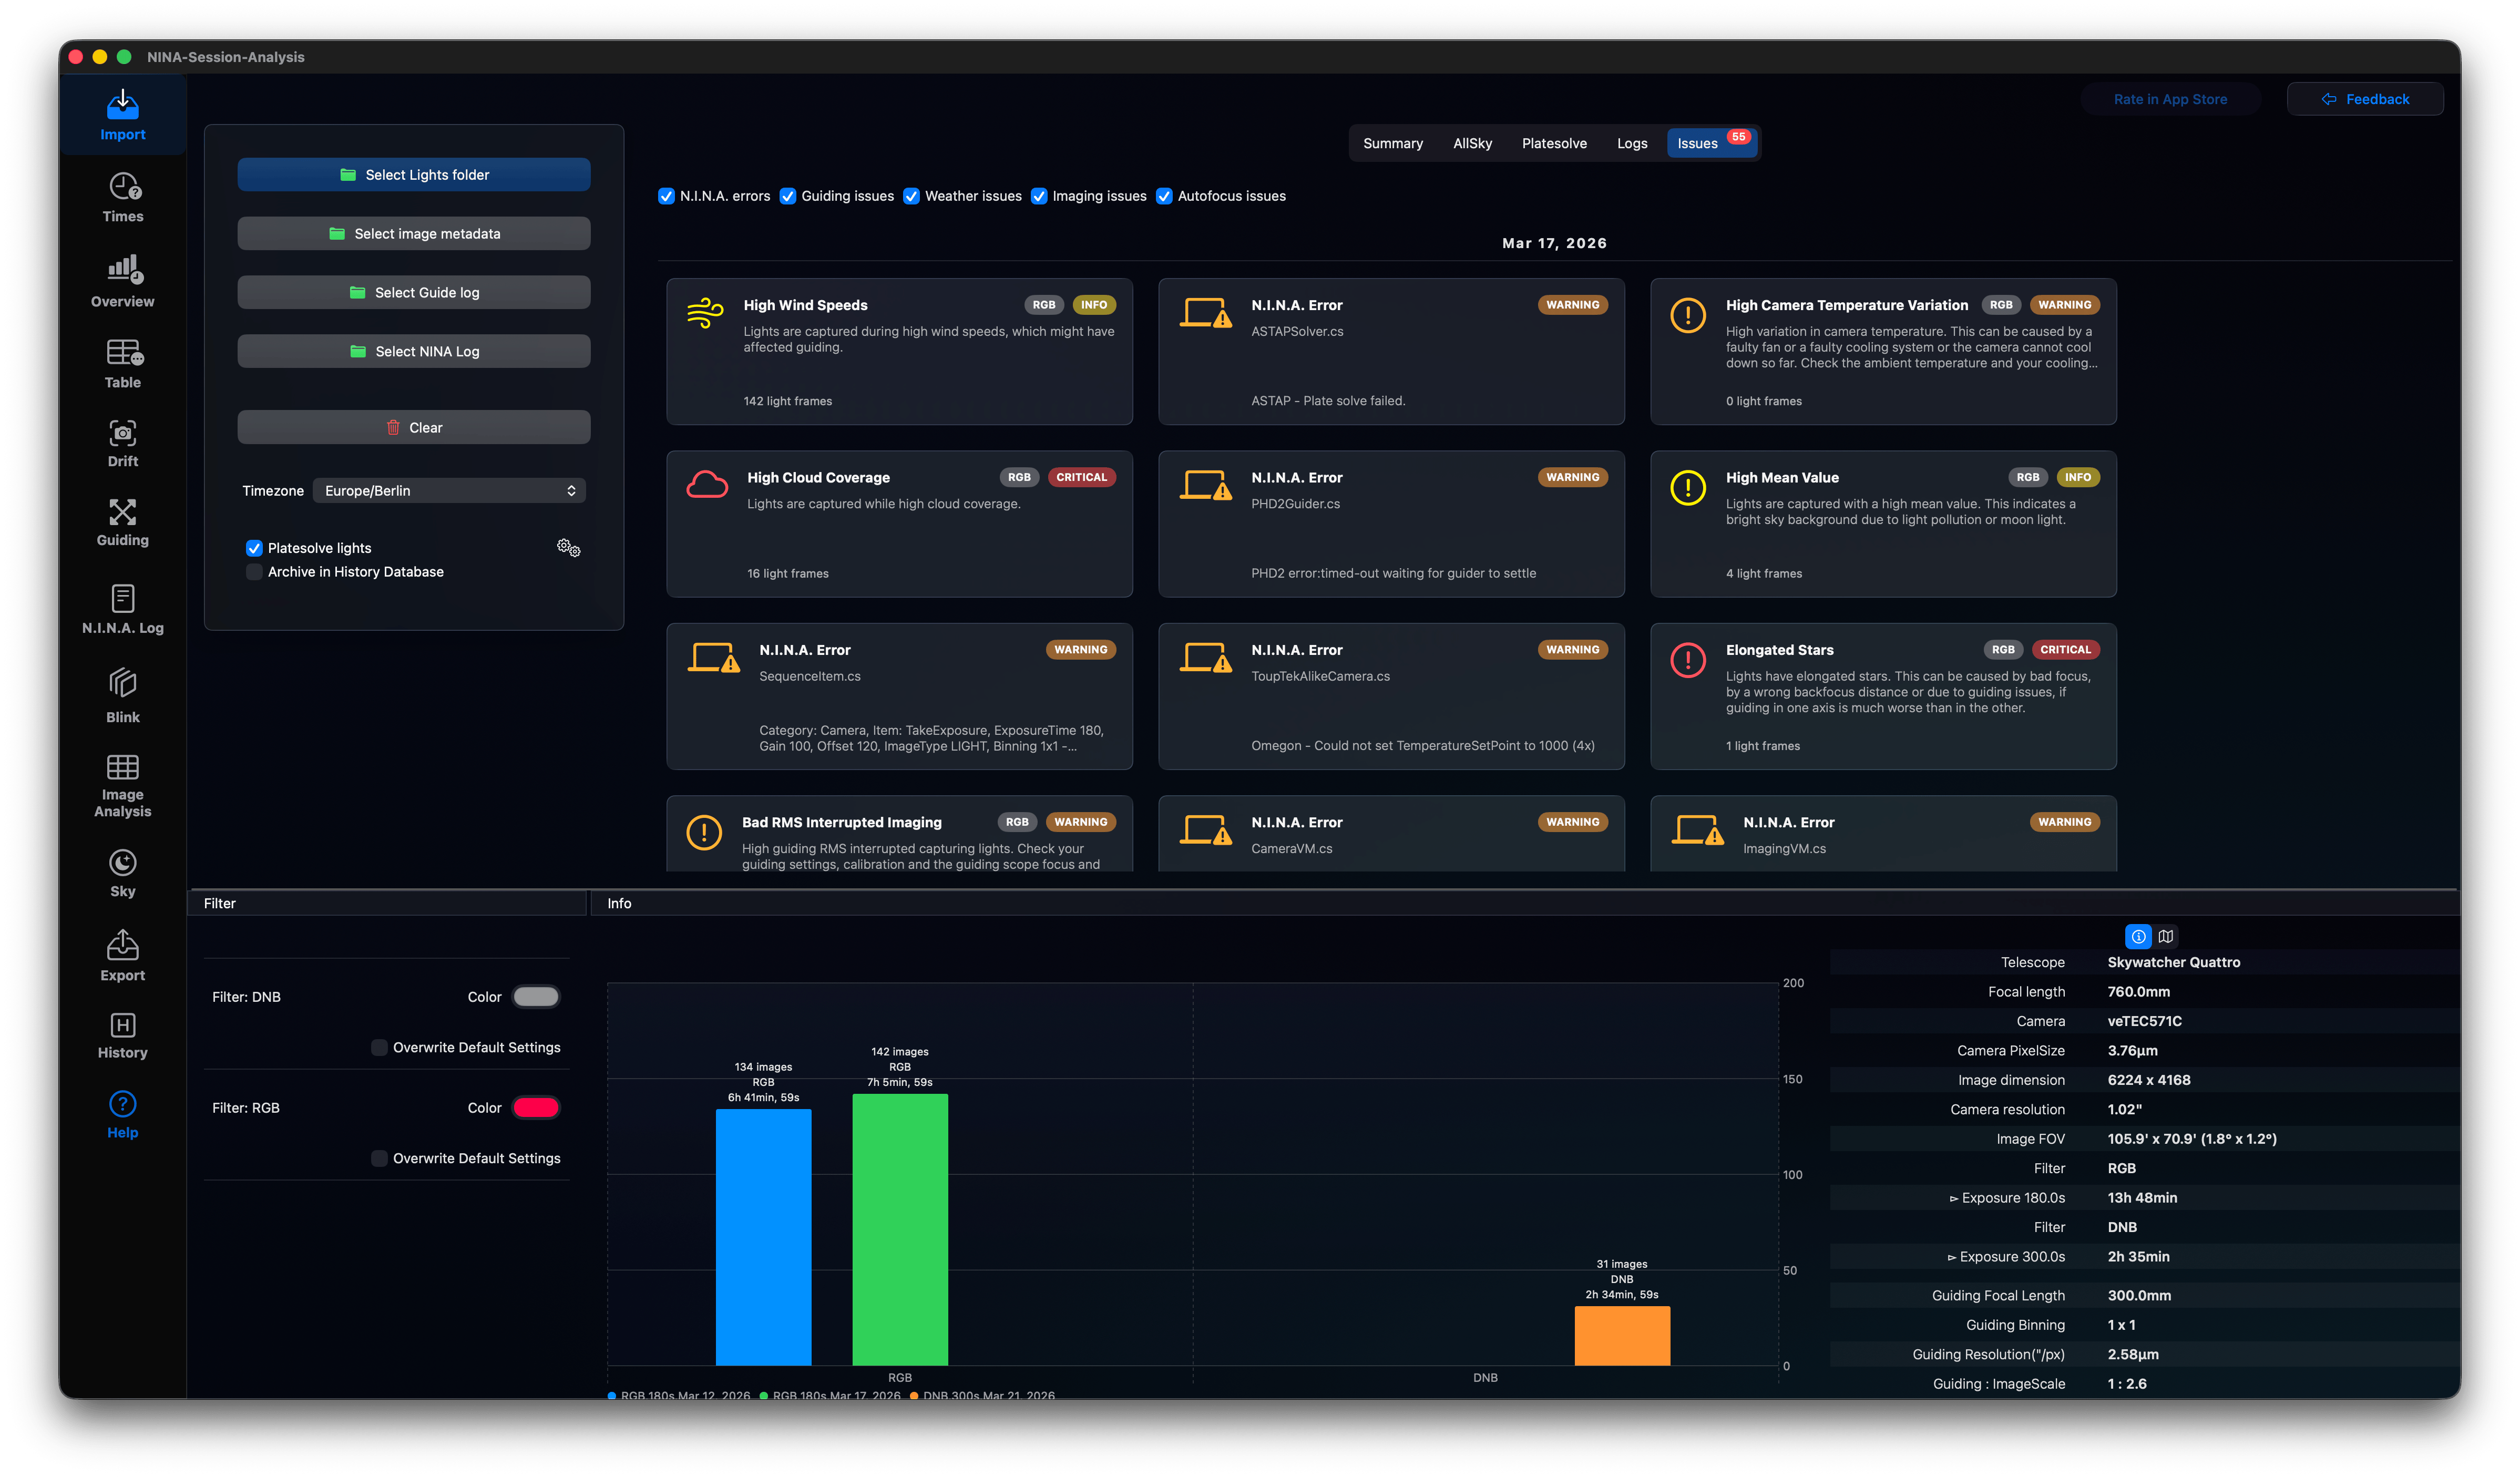
- Issues: Displays detected warnings and exceptions.
Input Controls Panel
The left column contains command buttons to manage raw files:
- Select Lights folder: Main import button. Recursively scans the selected folder for FITS/XISF images.
- Select Image Metadata: Manually load CSV files if they are located outside the main lights directory.
- Select Guide Log: Load PHD2 guide logs. Parses calibration steps, dithering events, and guiding pulses.
- Select NINA Log: Import N.I.N.A. logs. Parses autofocus runs, slewing events, and warnings.
- Clear: Wipes current session data and clears cache files.
- Timezone Picker: Preselects your local timezone. Important: If capturing from a remote observatory in a different timezone, match this to the remote observatory's location to correctly align N.I.N.A. log events with your FITS file creation dates.
Analyzer Settings
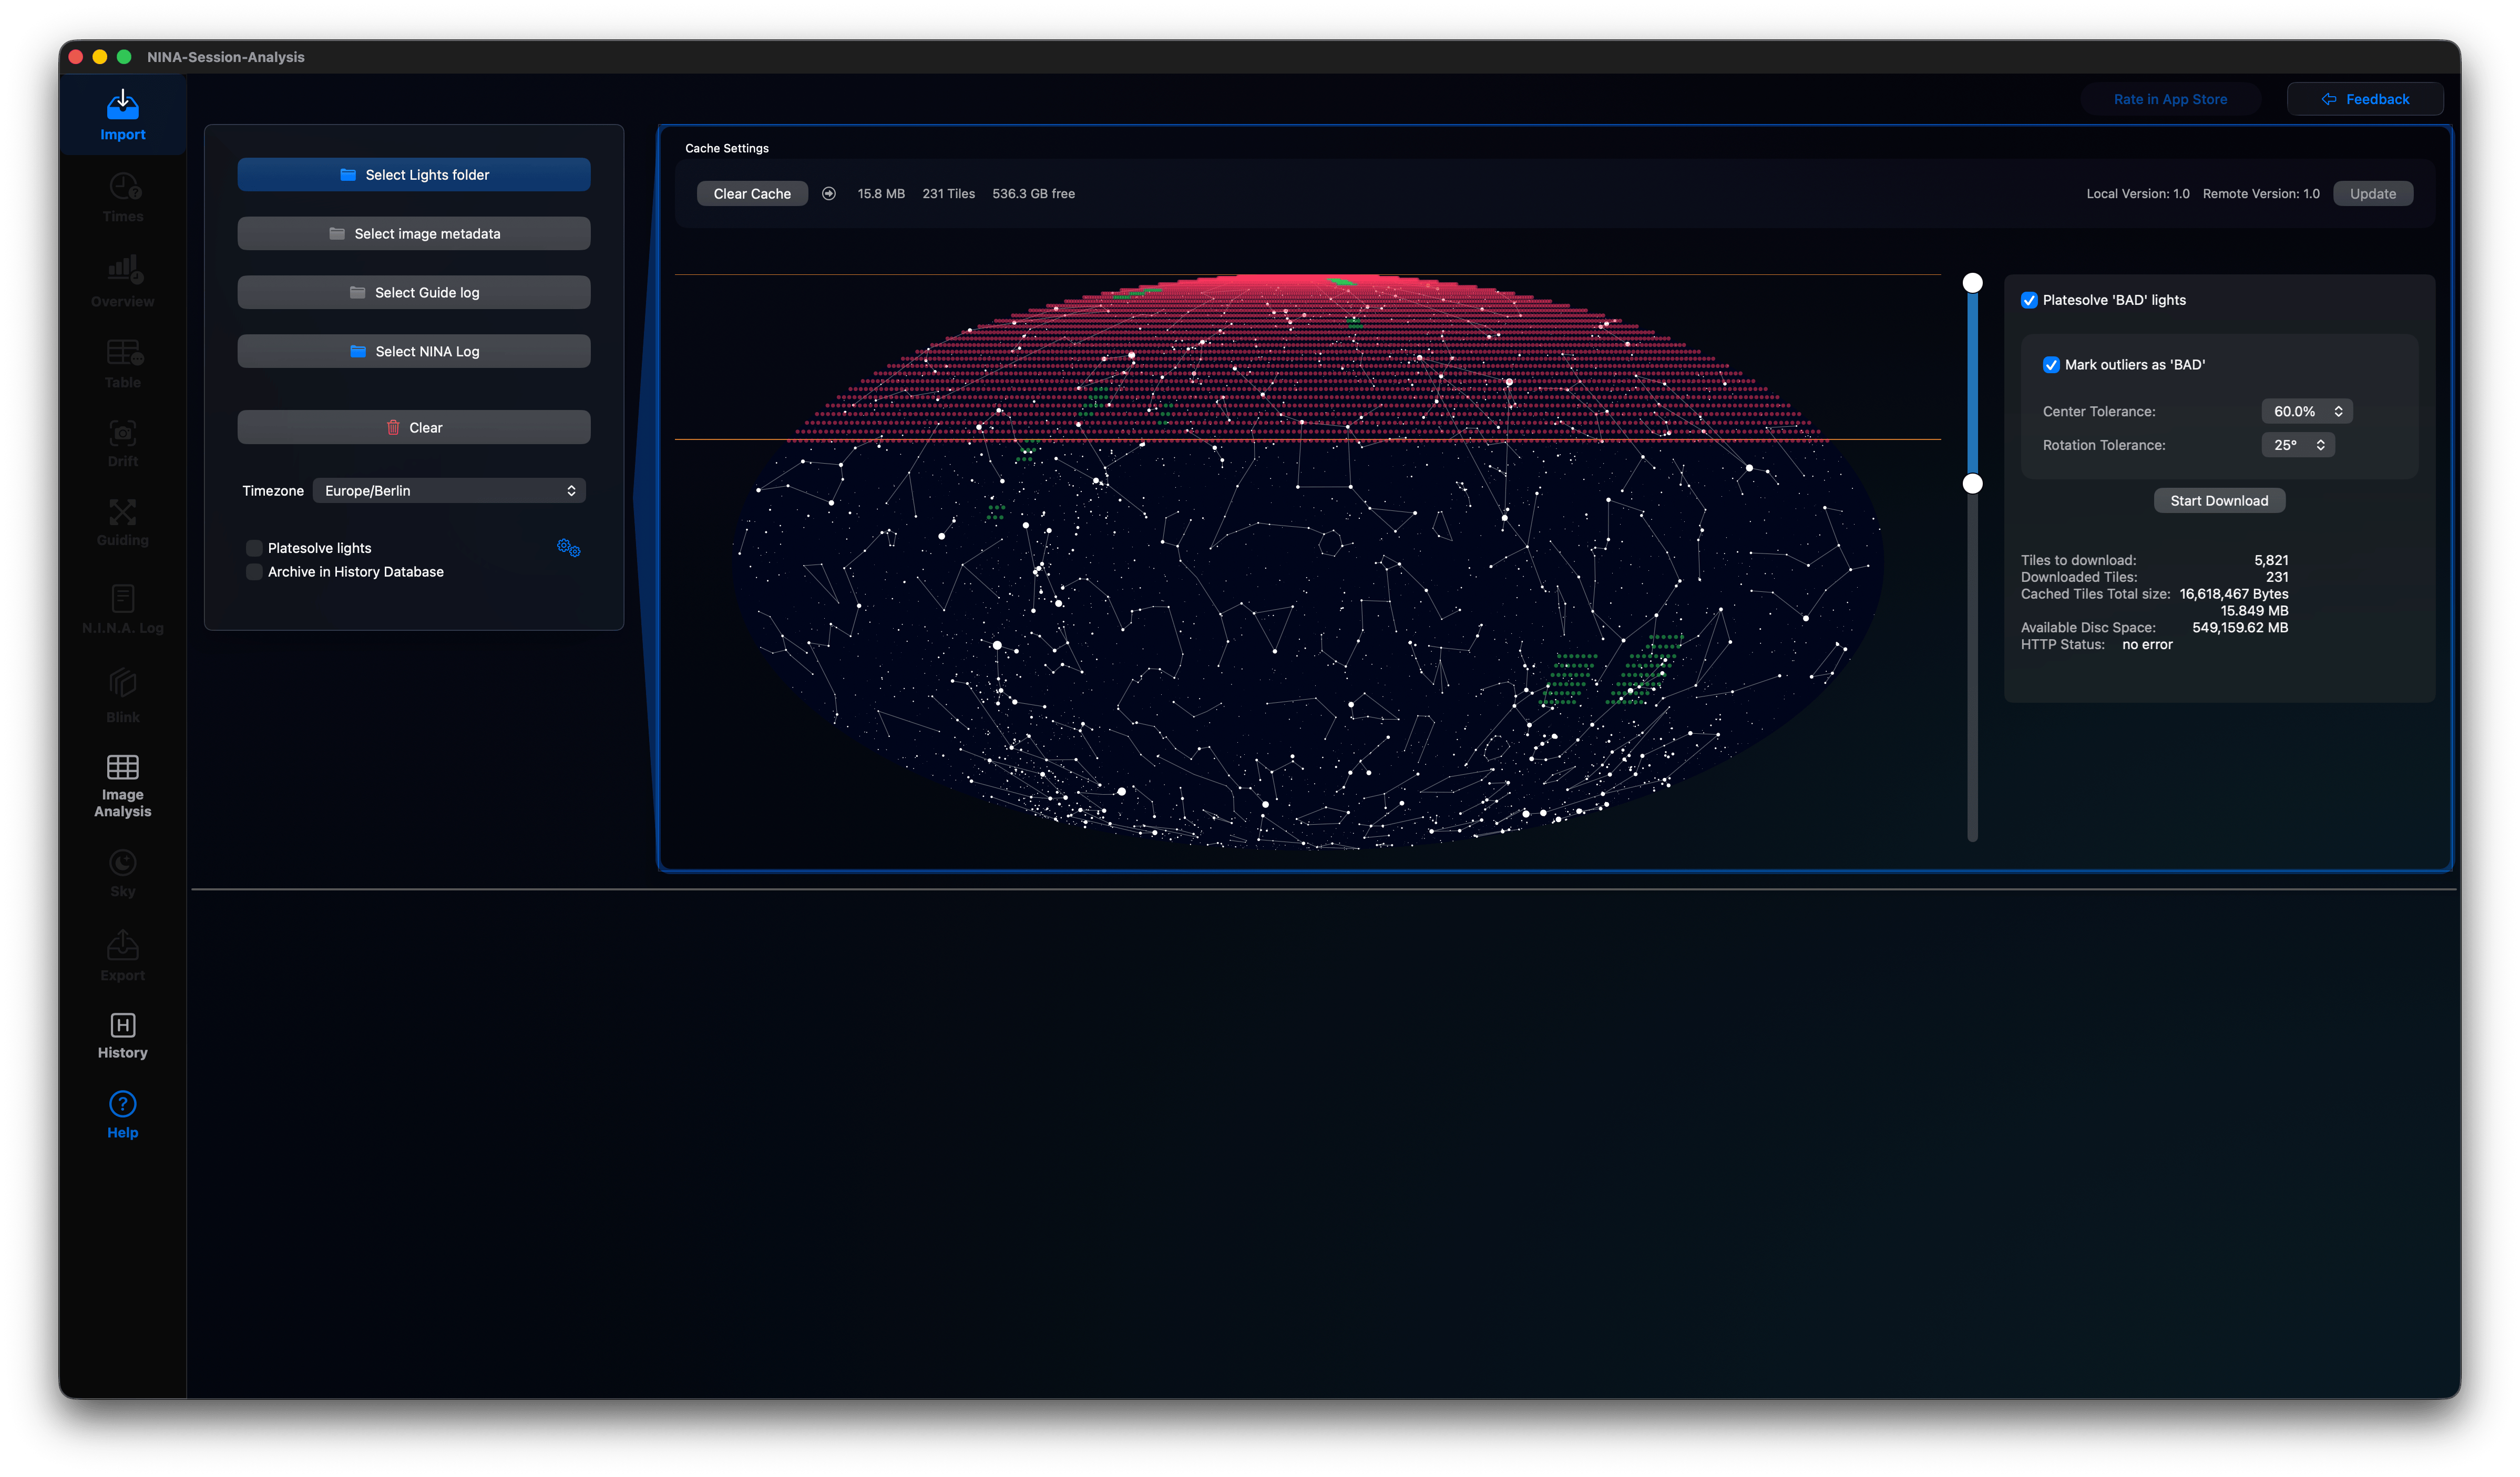
Platesolve Lights
Enabling Platesolve lights uses your platesolving configuration to read and refine target coordinates from FITS files.
* Clicking the Gear Icon opens Settings for the Platesolver to customize processing parameters.
-
On top you find information about the cached star tiles, which are downloaded automatically and used for platesolving. You can clear the cache to save disc space. On the right side there is a version information. If there is a new version of tiles available you will need to use these new tiles for the best results. You can just update all tiles available in your cache, so you can use the platesolving offline.
-
The Mollweide sky chart shows all available tiles
- The red dots are tiles available remotely
- The green dots are tiles available inside your cache.
- The slider on the right can be used to select a range of tiles to be downloaded for faster offline usage. Select only tiles you will need!
- On the right you can press the button „Start Download“ to download all selected tiles not yet available offline.
-
You can also switch off „Platesolve 'BAD' Lights“ to save time, because oftentimes such lights cannot be platesolved.
-
Lights, which are far away from the average image center can be automatically changed to ‚BAD‘ (adding BAD_ to the filename). You can set the center tolerance and the rotation tolerance and lights above these thresholds are automatically changed to ‚BAD‘ lights.
Close this view by clicking the Gear Icon again!
Archive in History Database
Toggling Archive in History Database automatically logs this session into the internal historical database upon import, making it available for multi-session and historical queries.
After processing all your lights and metadata, the app looks like this:
Filter Colors
Located at the bottom left are the filter settings, this allows you to customize the colors assigned to each filter (e.g., Red, Green, Blue, H-Alpha, OIII, L). These colors are used throughout all graphs in the application.
Info
The chart in the bottom middle you find a graphical summary of the captured lights per session. On the right you will find some metadata like the camera used and the guide scope. You can also find your observer location in the map.
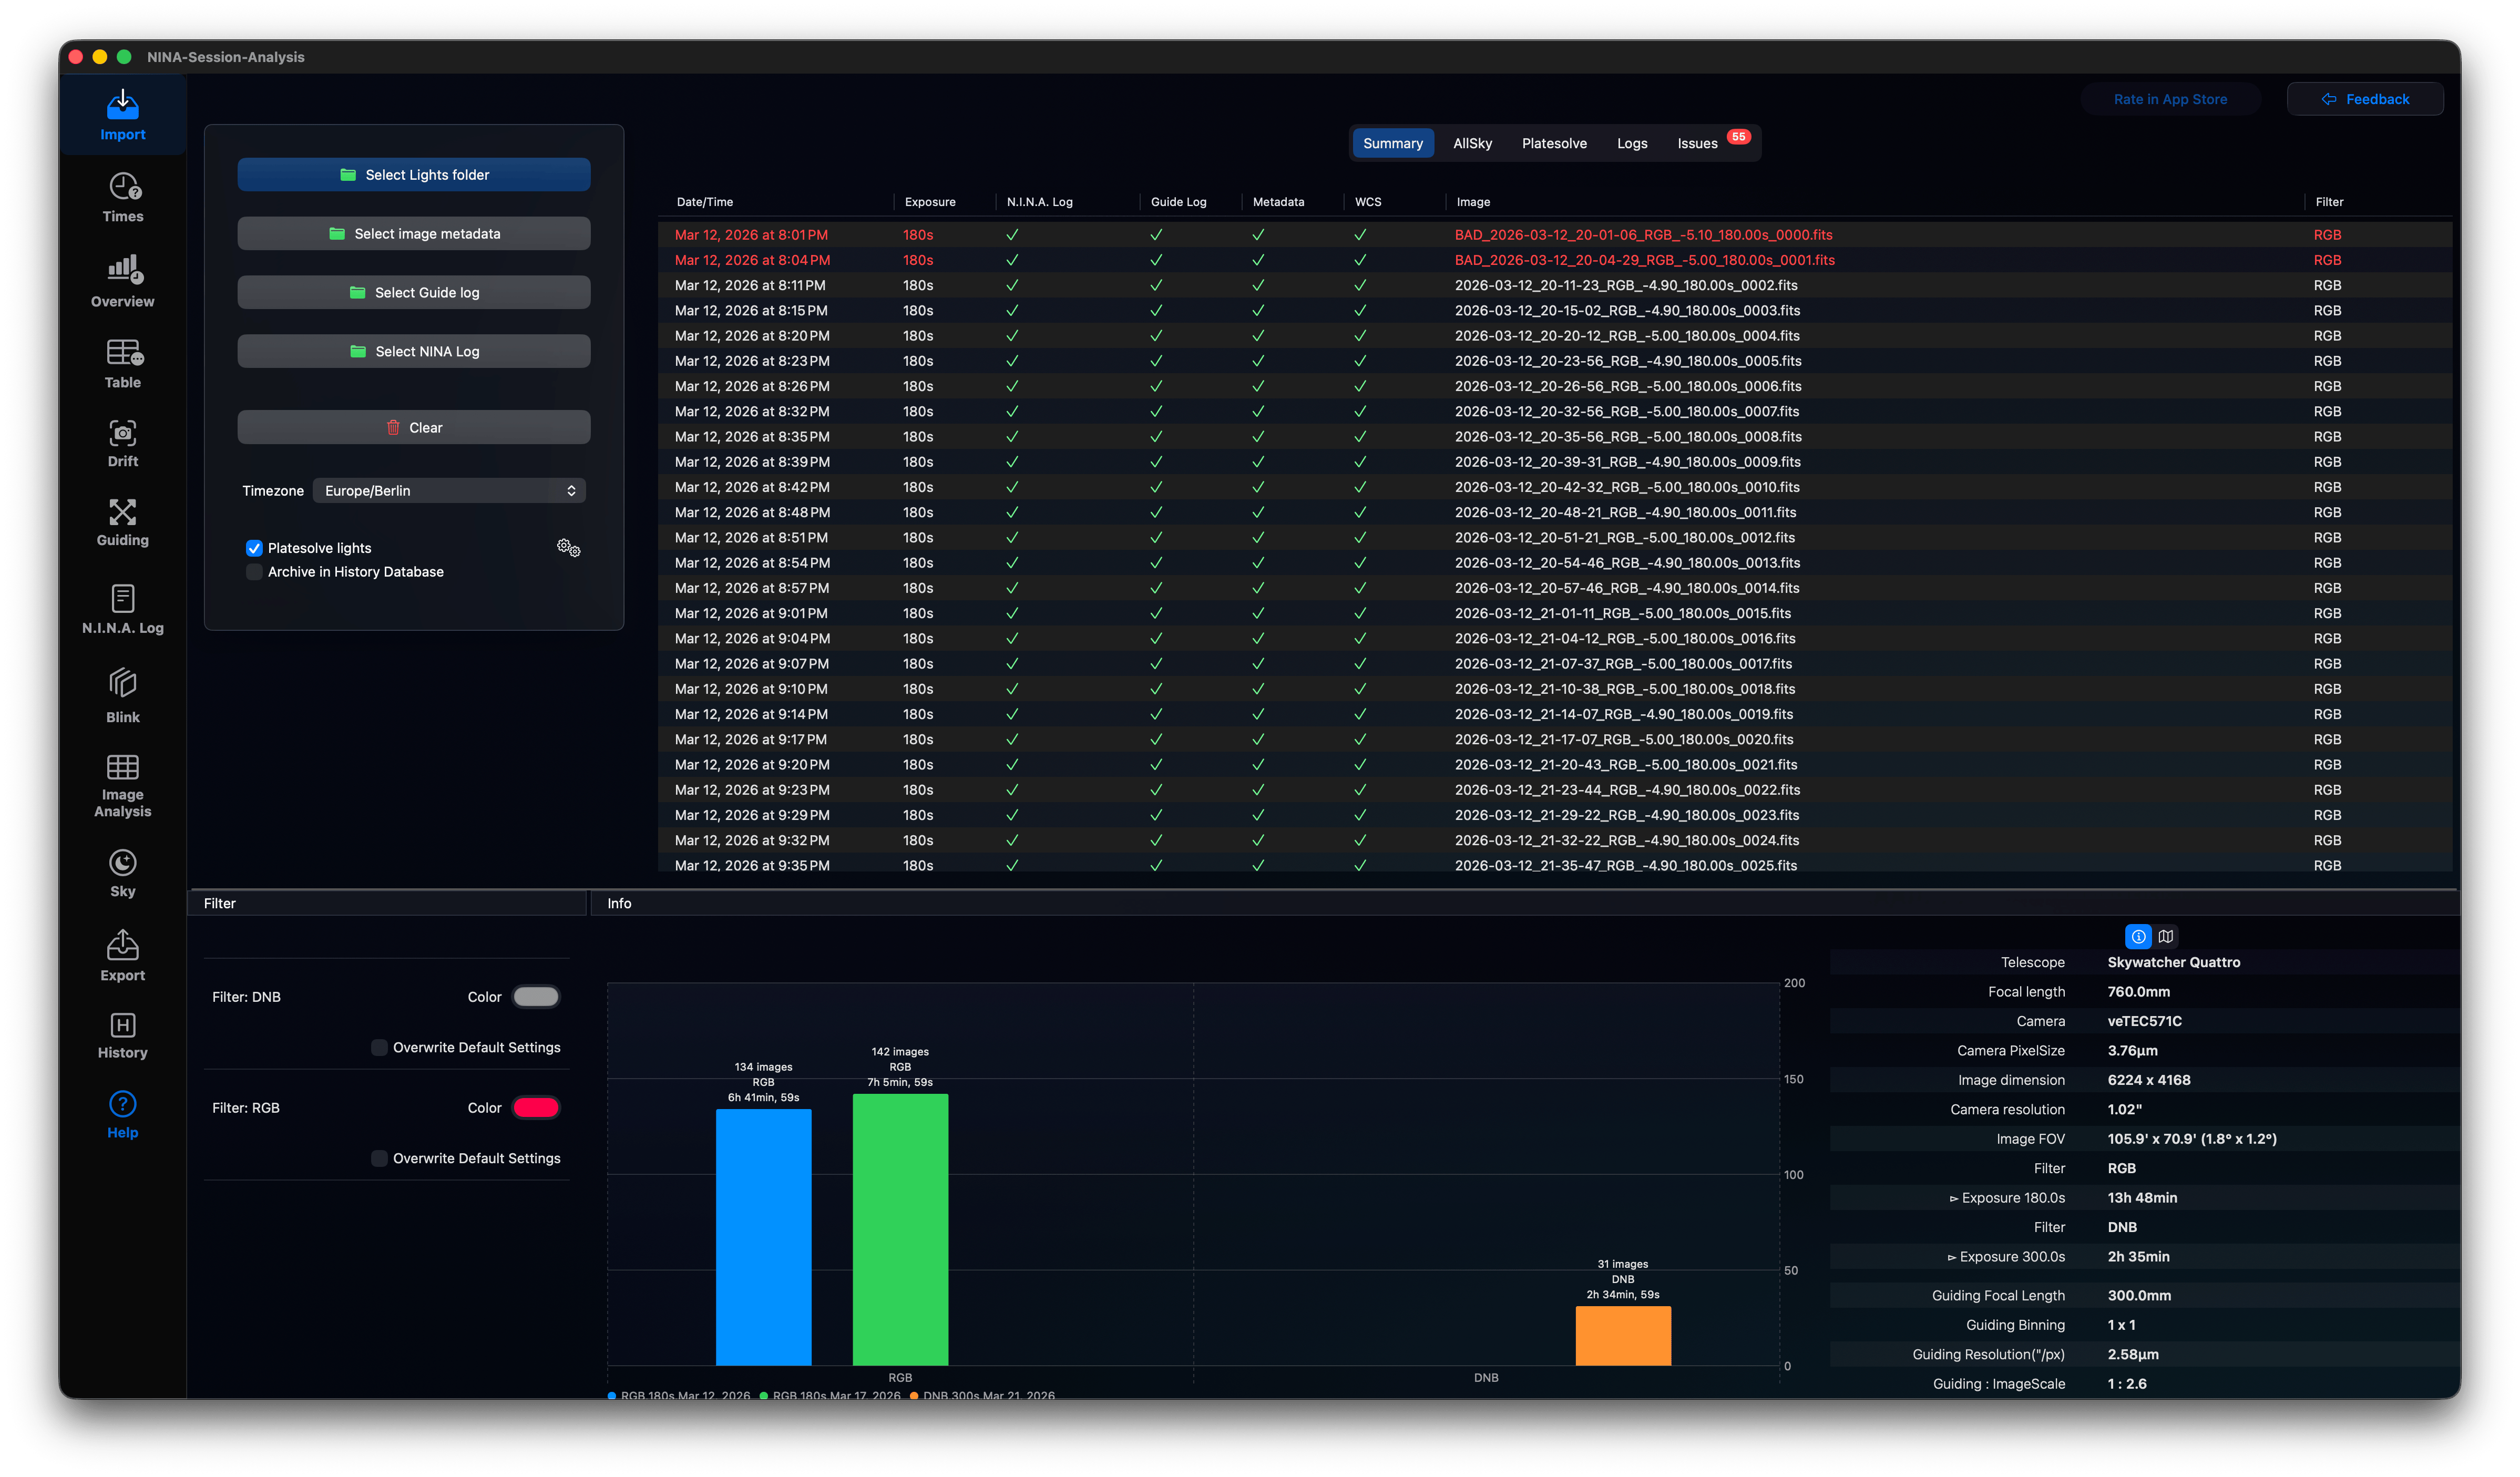
Summary
The summary tab shows a short table of your lights with Date/Time, Exposure Time, Filter and shows all available information
- N.I.N.A. Log checked, if for this light exists a N.I.N.A. logfile
- Guide Log checked, if for this light exists a Guide Log
- Metadata checked, if metadata is available for this light
- WCS checked, if a complete astrometrical solution exists for this light or it was Platesolved successfully during import
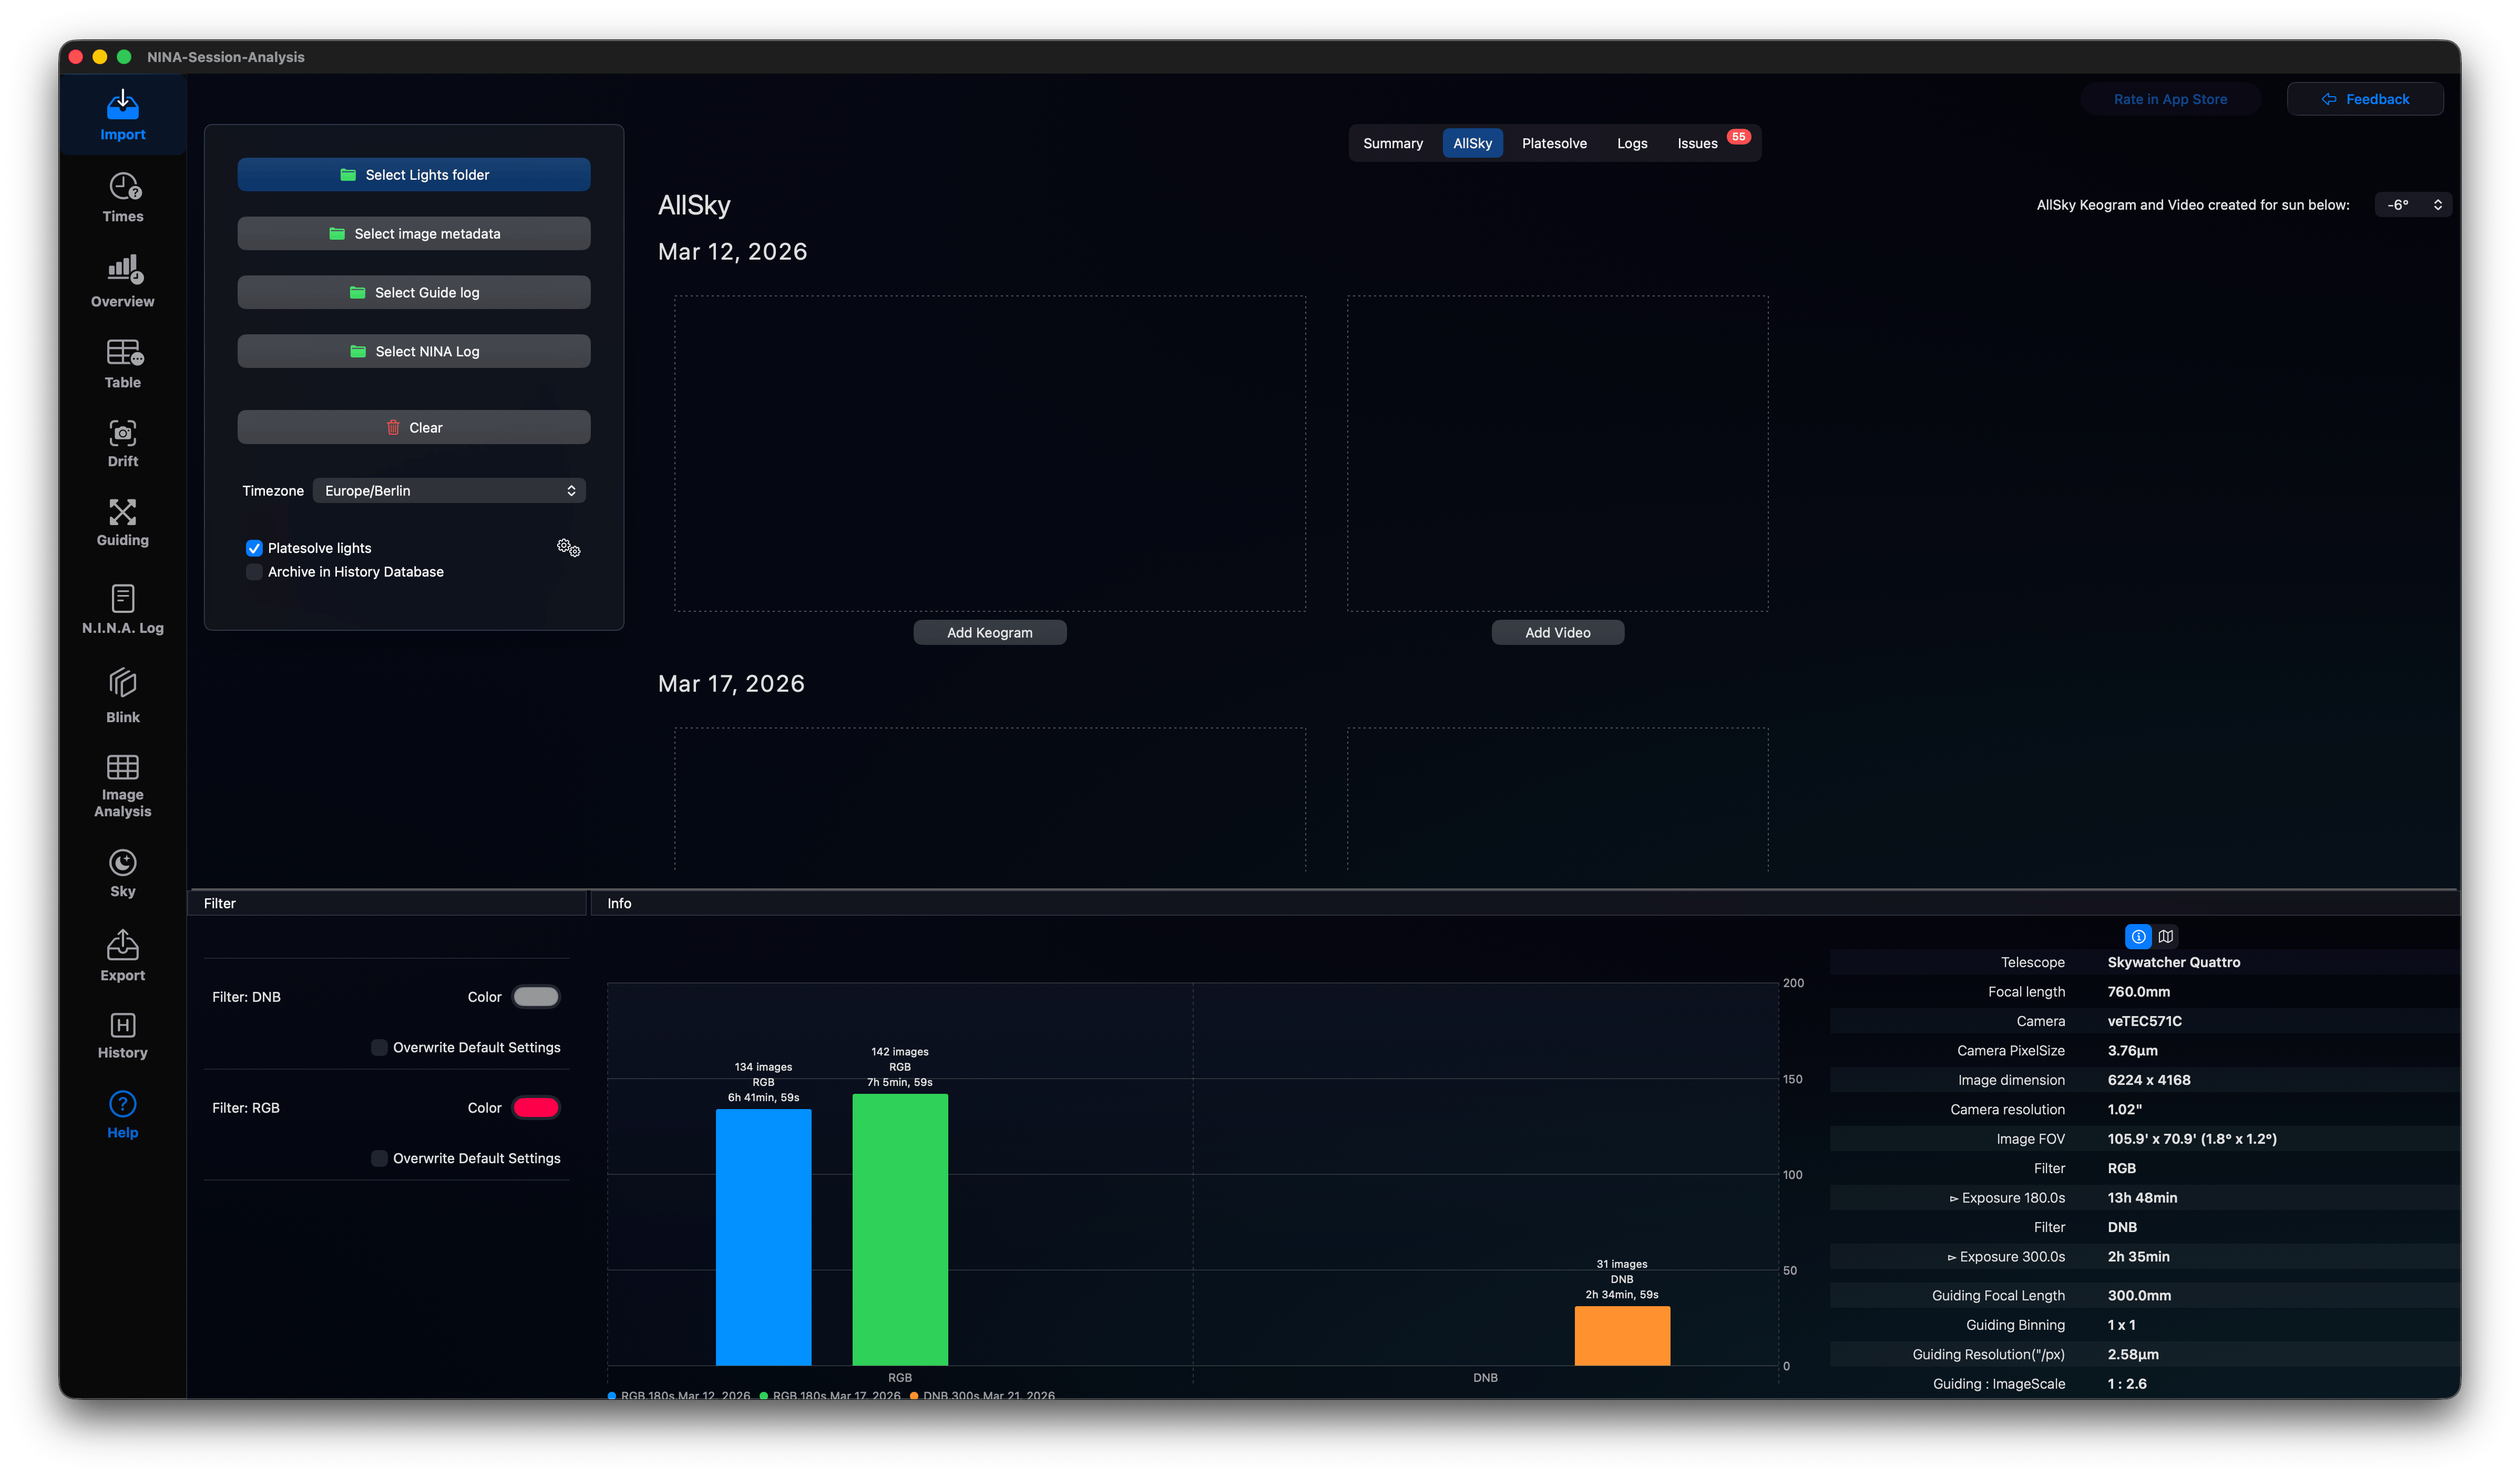
AllSky
You can add an AllSky Keogram and/or video for each night here, so you can have a look on it when you need to evaluate your light for clouds from inside the table or the Blink Tool. Please set the start time configured in your AllSky camera, for instance the Video starts when the sun is below -6° below the horizon. This is required to place a marker on top of the Keogram, otherwise this marker will not be placed correctly. You can click on the button or use drag & drop to add video or Keogram image.
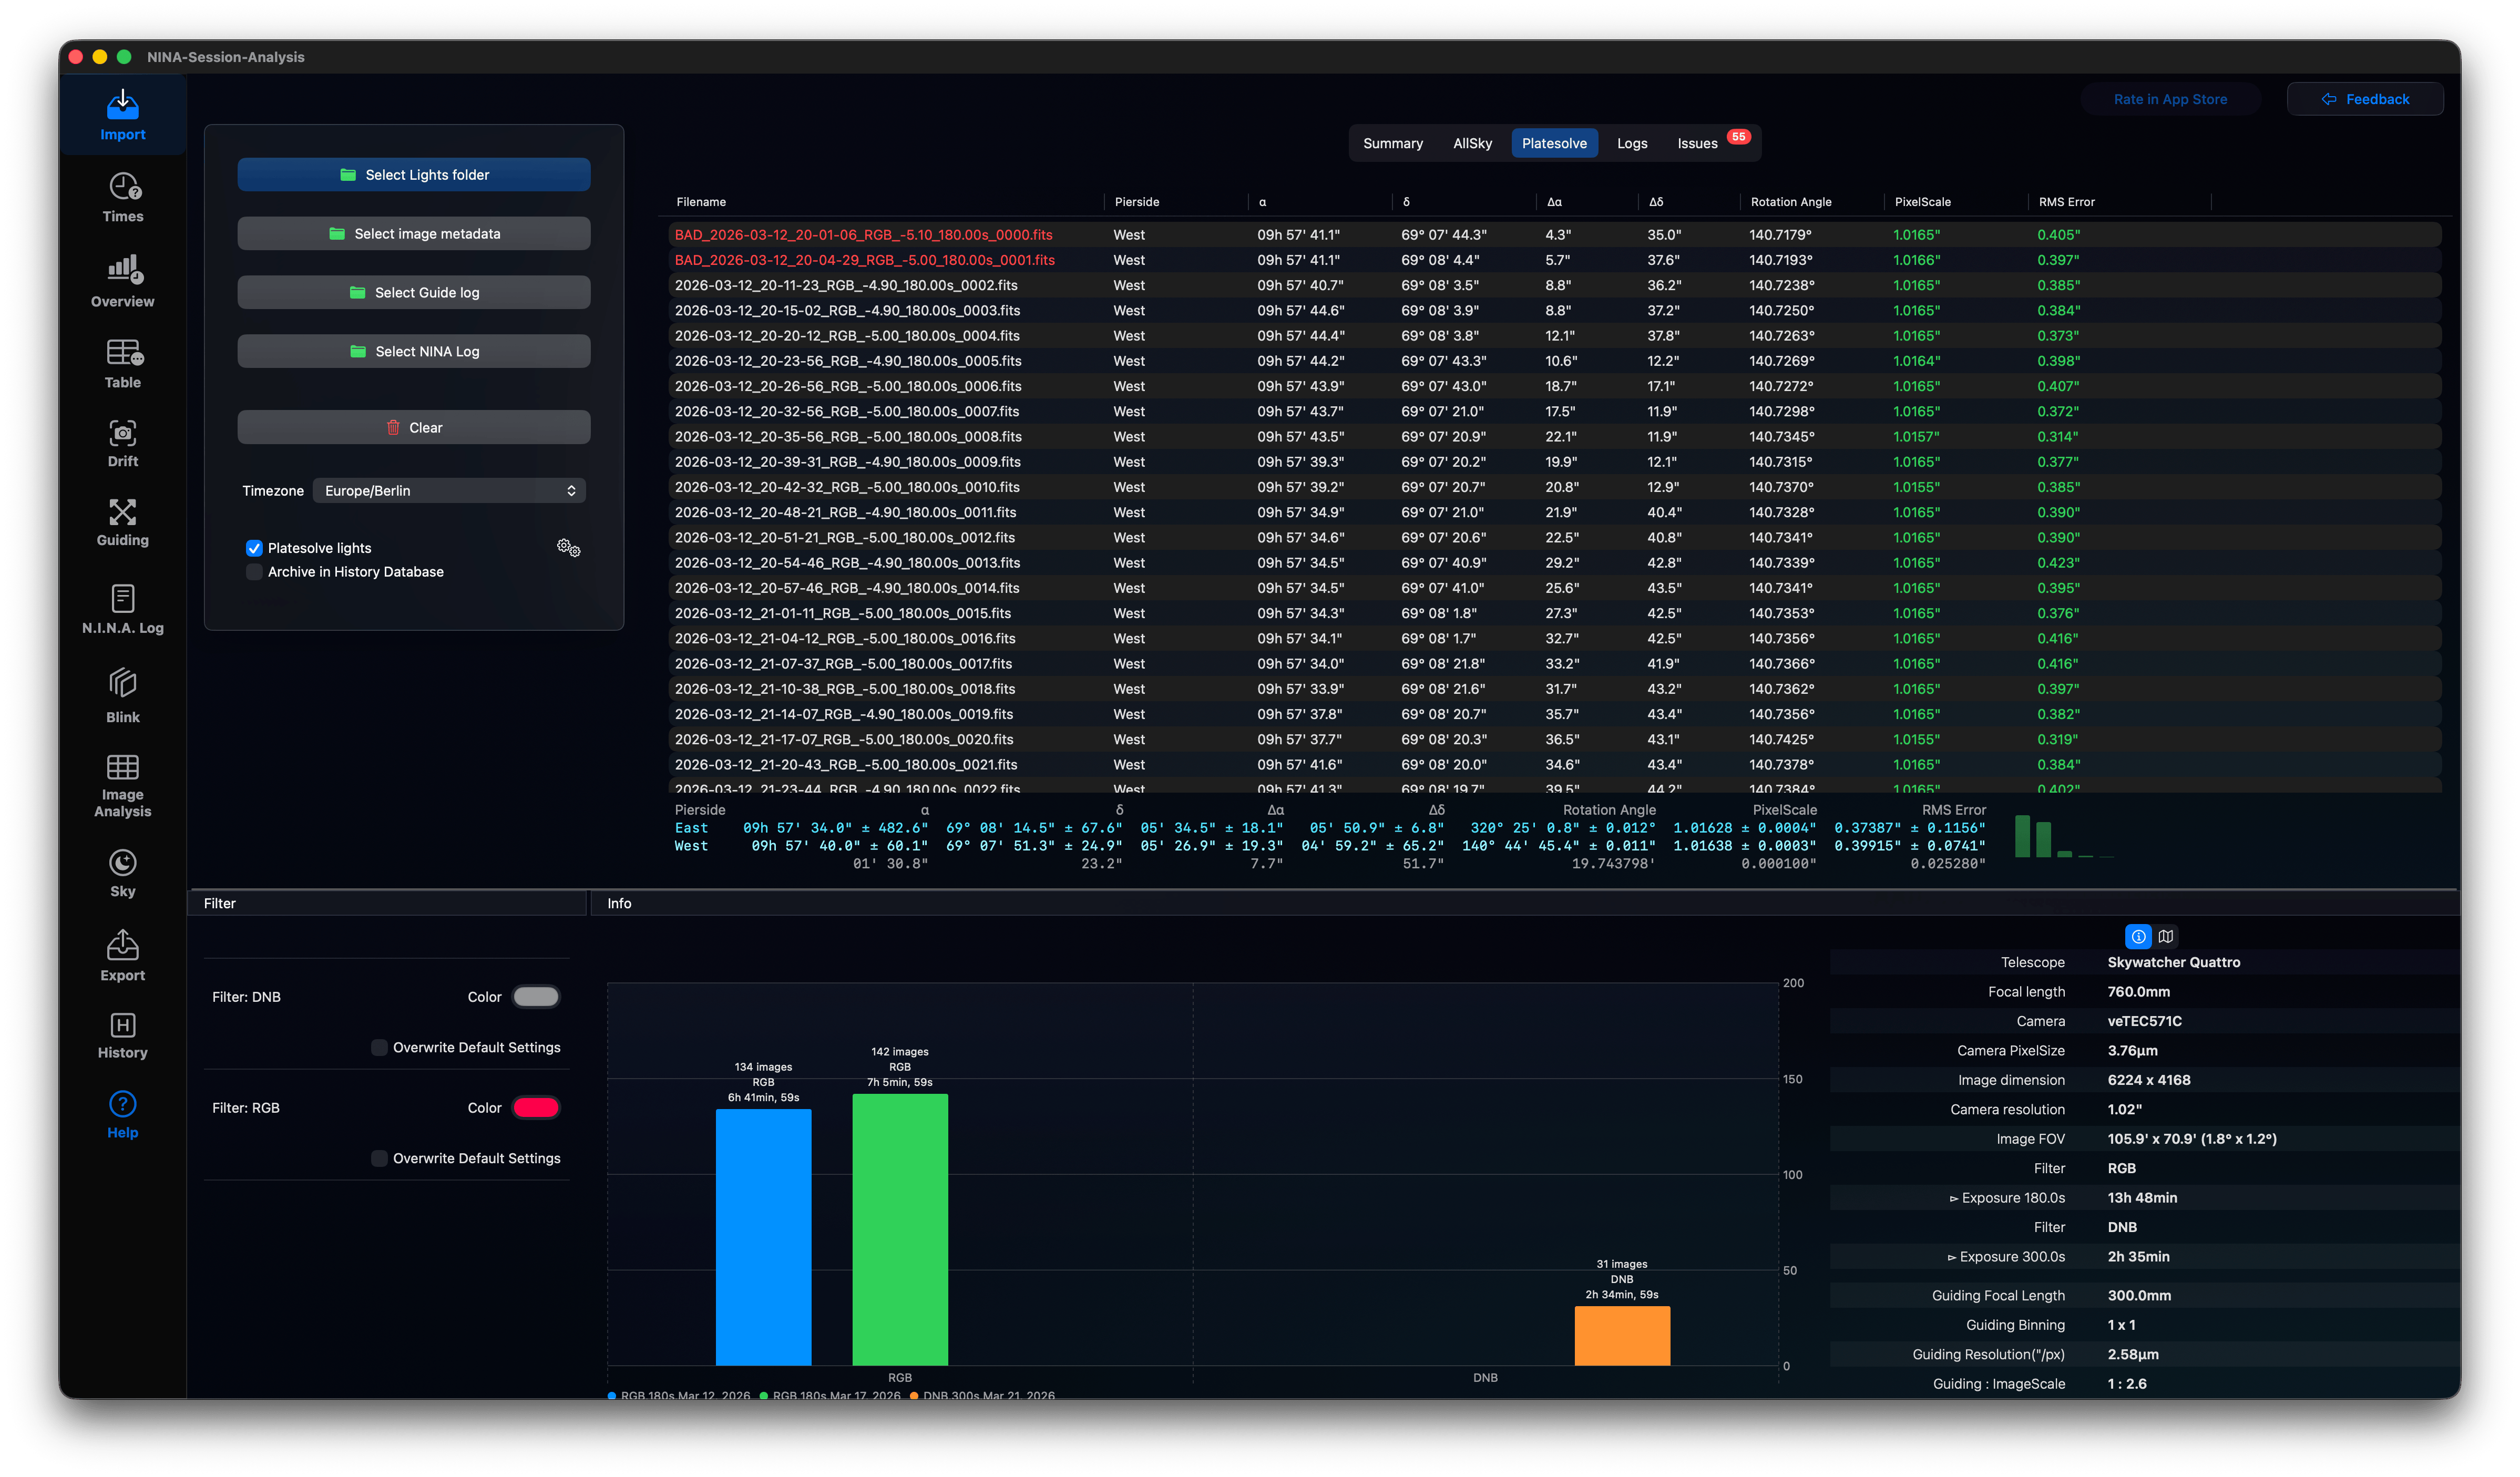
Platesolve
The summary tab shows a short table of your lights with Date/Time, Exposure Time, Filter and shows all available information:
- Filename
- Pierside
- ɑ the right ascension measured by the mount
- 𝛿 the declination measured by the mount
- Δɑ the difference between the platesolved right ascension and the mount right ascension
- Δ𝛿 the difference between the platesolved declination and the mount declination
- Rotation Angle derived from the Platesolving
- PixelScale derived from the Platesolving
- RMS Error is the overall Root Mean Square error of all stars in arc seconds and depends on your image resolution and seeing.
Logs
You can have a look at the import log here.
Issues
Located in the Issues tab, the application runs automated statistics checks such as: - Offset Verification: Checks if your camera offset ADU level is sufficient. - Exposure Limits: Warns if exposure times are too short to overcome camera read noise or too long (leading to saturated stars). - Log Exceptions: Flags N.I.N.A. error exceptions and sequence interruptions.