Create Hubble Palette from OSC image
This script requires a linear image captured with a dual narrowband filter. The image must be cropped and gradients should be removed and the image must be opened in PixInsight.
You can find this script under Scripts => Toolbox => CreateHubblePaletteFromOSC.
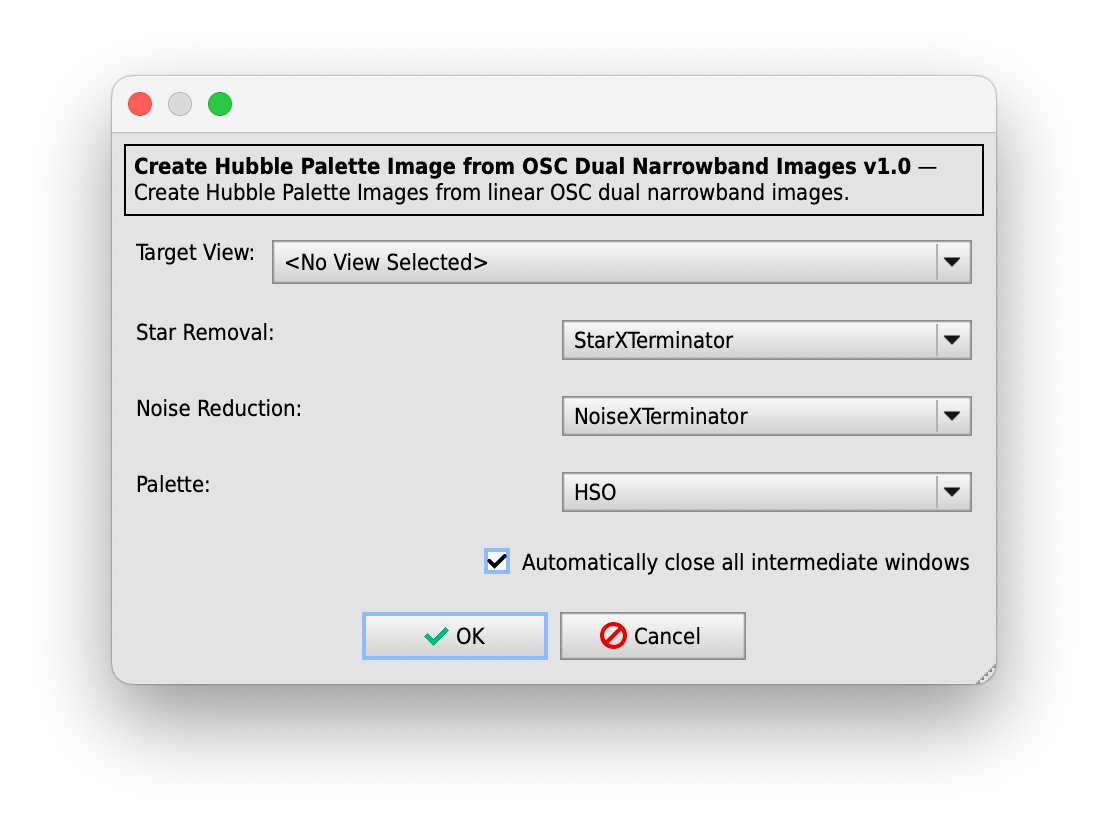
- Select the image you want to process as the "Target View".
- Normally you want to remove the stars from this image and perhaps add the stars extracted from another RGB image, so you should select the tool to be used for removing the stars. If so, you will need to have installed "StarNet2" or "StarXTerminator" (only Version 2 or later supported) . The first version of "StarNet" is not supported.
- The script wants to remove the noise in the image by a small amount. If available you can use "NoiseXTerminator" for this task. Otherwise select "MultiscaleLinearTransform" to perform a noise removal. If you want to do the noise removal by yourself beforehand, please select "None".
- Finally select the type of Hubble Palette to be created. Choose between "HSO", "SHO", "OSH", "OHS", "HOS", and "HOO". If you can't decide which palette you want to create please select "All" to create all palettes at once.
- During processing the script will create 4 images and does all the processing for you. When the final image is created the script will normally automatically close all intermediate images. If you want to keep these images open please uncheck "Automatically close all intermediate windows".
Press "OK" to start processing the selected image or "Cancel" to close the script without processing.
Improve Brilliance
Using the script „Improve Brilliance“ you can enhance the brilliance of your color image. This is done by enhancing the contrast, sharpening, contrast-limited adaptive histogram equalization and increasing the color saturation.
Select the target image to be processed. You don’t need to change anything, the default settings should work for most images. However, if you want you can increase the contrast and the color saturation. With the Brilliance slider you can define how much CLAHE and sharpening will effect your image. You can increase the brilliance for a stronger effect or decrease to minimize the effect to only the brightest parts of the image.

Contrast: Increasing the contrast will highlight the brighter parts of your image and dim the darker parts. Sharpening and CLAHE will be concentrated more on the brighter parts and these will be emphasized more. However, very dark structures will become a little bit darker. For galaxies and nebula with large darker structures you should not increase the contrast.
Brilliance: The brilliance value controls the overall amount of all enhancements. Increasing the brilliance value will make all these effects become more prominent. If you prefer a less pronounced image just reduce the brilliance value to make the enhancements more sattle.
Color: While the contrast influences the shadows and highlights, the color slider can increase or decrease the colors in your image by a small amount.
Feel free to experiment with these sliders. There will be only very settle changes in the image, but these slightly changes will improve your image. In fact all settings are limited to only a small range to avoid any too harsh change.